←→
4.1Turning
Use the Left Arrow and Right Arrow keys to turn. The longer you hold down the key, the farther Tux will turn in that direction.
Player’s guide
Menus, controls, the racing screen, cups and practice: everything you need to get Tux down the mountain with a belly full of herring.
Below are some descriptions of the various menus you will use to navigate through Tux Racer.

This is the first screen you see once Tux Racer is started. You can hit any key or click the mouse to move on to the Main Menu.
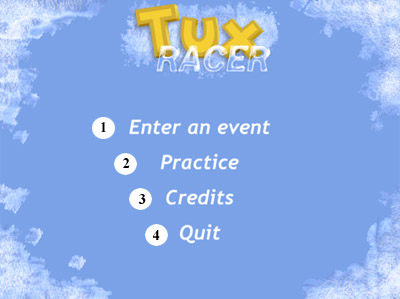
This is the Main Menu in Tux Racer. Note that if you hit the Esc key while in this window it will exit the game.
Tux Racer has been designed to make controlling Tux easy and fun. The menus can be navigated with mouse and keyboard, and Tux is controlled using the keyboard.
Use the Left Arrow and Right Arrow keys to turn. The longer you hold down the key, the farther Tux will turn in that direction.
Use the Up Arrow key to make Tux paddle when on the ground and make Tux flap his wings when in the air. This will help you gain speed, especially at the start of the race. Once Tux’s speed is in the yellow area of the Speedometer, paddling will no longer increase his speed, but instead start to slow him down.
When Tux becomes airborne, flapping his wings will help him stay in the air longer. Use the turn keys while flapping to adjust Tux’s direction while in the air.
Use the Down key to make Tux brake. This will slow him down, which is useful in getting through some tricky spots on the courses. Remember that Tux can turn tighter when traveling at slower speeds.
Use the E key for jumping. To jump, you must first press and hold the E key to charge energy. This will cause the Energometer level to increase. The fuller the Energometer, the bigger the jump. Releasing the E key will use the charged energy to make Tux jump.
Tux can start charging for the next jump (by pressing E) while still in the air.
To do a hard turn, hold down the brake key (Down Arrow) and then press one of the turn keys (Left Arrow or Right Arrow). This will cause Tux to do a sharp turn, but will also slow him down.
The Backspace key is used to reset Tux’s position. If you get stuck on a course, press this key.
Pressing the Q key while racing will end the current race.
Once you are racing, you will have a number of displays. This section describes what each of these are.
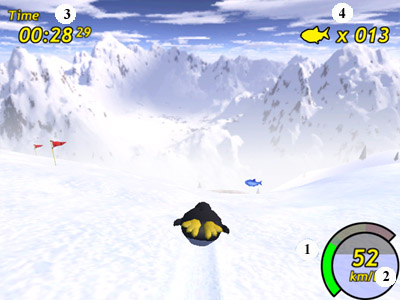
The Speedometer shows the current speed of Tux. The speed is displayed in graphic form around the outside of the Energometer, and also in numeric form over the Energometer. As Tux’s speed increases, the colour of the Speedometer changes from green to yellow and then to red. When in the yellow, paddling will no longer increase Tux’s speed, but instead will begin to slow him down. Once in the red zone you will find steering difficult.
The Energometer displays Tux’s current energy level. As the circle fills with blue, Tux’s energy increases until the circle is full. The Energometer decides how far and high Tux can jump. See the Jumping section for more information.
The number in the top left of the screen shows the elapsed time for the current race.
The number in the top right of the screen shows how many herring Tux has collected in the current race.
The races in Tux Racer are grouped into events. Currently, there is only one event in Tux Racer, the Herring Run, in which you must collect a certain number of herring within a specified time.
The races in each event are grouped into cups – each cup consists of a series of races that you must complete, in sequence, before you may advance to the next cup. You are given four lives to complete each cup and lose one for each time you fail to win a race. Once you run out of lives, you must restart the cup from the beginning.
In the Cup Racing Menu you can select the event and cup in which you will compete. This section describes the menus that are used on the Cup Selection Menu.
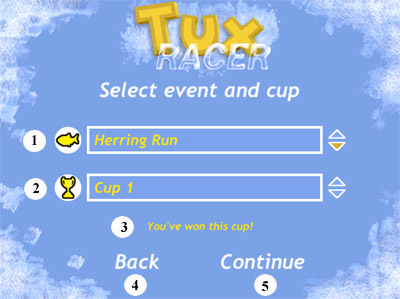
When competing in a cup that you have not yet completed, this menu guides you through the races in the cup. You must complete the races in order. For example, you must win the first race in a cup before you can enter the second race. You are given four lives in which to complete all of the races in a cup. If you run out of lives, you will have to re-enter the cup and start over from the first race.
This section describes the menus that are used on the Cup Race Selection Menu.
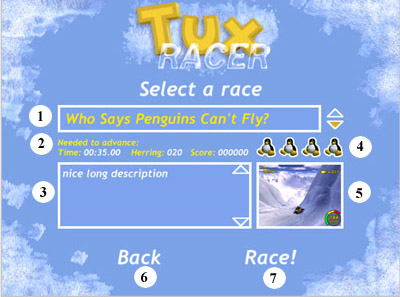
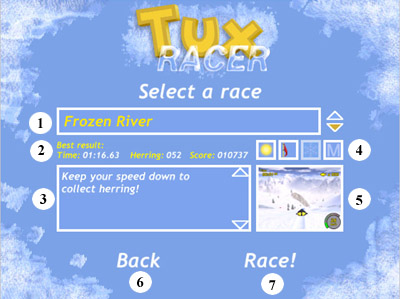
Once you have completed a cup, this menu can be used to replay any of the races in a cup so that you can try to improve your score.
Below the name of the course is a listing of the requirements to beat it. The course may have requirements for maximum time, herring collected, overall score, or any combination of these. To progress to the next course you must beat these requirements. The time listed is the time to beat, the herring listed is the minimum number of herring you must collect, and the score is the minimum score you need to get.
If any of the requirements are listed as 0, then there is no requirement in that category.
To complete each cup, you only have a set number of lives to beat all of the courses. If you beat a course, you don’t lose any lives, and proceed to the next course. If you do not beat the course, then you use up one of your lives (one Tux will disappear from the row) and you can try the same course again. When all your lives are exhausted (no more Tuxes in the row) then you cannot continue the cup, and must re-enter the cup and start over from the first race.
Tux Racer has a Practice mode in which you can hone your racing skills. In Practice mode there is no lives counter, so you can play any course as often as you like. You can also customize the race options for more challenge.
The Practice Menu lets you choose a course on which to race, and allows you to customize the race options.
A number of options can be set for the current race on the Practice Menu.
Points can be obtained in two ways: by beating the par time for the course, and by collecting herring. Move quickly and grab as many herring as possible to get the highest score.
Under Linux the options file is located in the ~/.tuxracer directory. Under Windows the options file is located in the config directory, which can be found in the directory in which you installed Tux Racer. This file is plain text, and is editable with any text editor, such as vi or Notepad.
Jasmin Patry
Patrick Gilhuly
Eric Hall
Vincent Ma
Richard Knowles
Mark Riddell